Are you tired of the same old hairstyles but not sure where to start when it comes to trying something new? Look no further than vintage hairstyles! These retro-inspired haircuts are not only elegant and sophisticated but also surprisingly easy to achieve. Whether you’re a fan of the classic victory rolls or the iconic Audrey Hepburn updo, vintage hairstyles offer a timeless appeal that never goes out of style.
In this blog post, we will be exploring some of the most popular vintage hairstyles that are making a comeback, along with step-by-step tutorials and tips to help you recreate these stunning looks at home. So get ready to transport yourself back in time and channel your inner Hollywood starlet with these easy retro haircuts for women.
1. How to style your hair with a vintage side part
This hairstyle is perfect for anyone who wants to achieve a vintage look without much effort. It will take you about five minutes or less! The first thing that you need to do is roll your hair back and pin it with bobby pins so that there’s no volume on the sides of your head, which gives off an old-fashioned vibe.
Next, create some waves by brushing through damp hair starting from the roots. This step will make sure that all of the curls are uniformed in size and shape and not too tight around the crown area.
Lastly, tuck away any stray pieces under one side of your pinned-up hair using more bobby pins if necessary. You can then release your bun after teasing out strands at the top layer
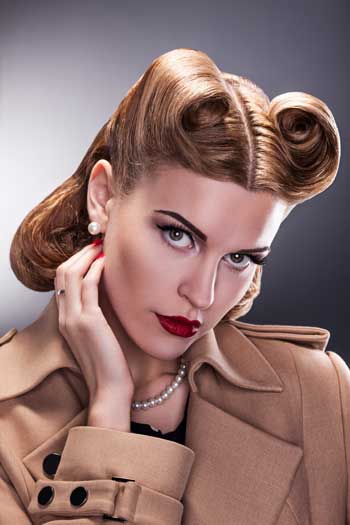
2. The best way to achieve a retro look with curls is to use a curling iron.
– Curl hair in sections, not all at once
– Use your fingers or the wide barrel of the curling iron and wrap hair around it as you go
– Start about an inch away from your scalp and curl outward
– Continue until curls are complete along the entire length of a sectioned off piece of hair (top wedding hairstyles)
The best way to achieve a vintage look is by using old-school techniques with new school products. This will give you that retro ‘50s vibe without feeling dated! Here’s how: – Apply setting lotion liberally throughout damp locks before drying out completely – Stretch up into a high ponytail for maximum height – don’t worry if there’s some frizz – Twist hair in two sections, one on either side of the head
– Wrap each section around a finger and pull tightly to create large bouncy waves
– Spray with hairspray for extra hold. A few more hand movements will make it look even better! To achieve vintage curls you can use a flexible rod or curl your locks into long tight ringlets using an outdated curling iron that hasn’t been used since the ’60s. It’s time to break out those oldies but goodies!
3. Retro Hair Extensions
Retro hair extensions are the hottest trend in vintage hairstyles. When it comes to choosing a set of retro hair extensions, there is one important question you need to ask yourself: what color would suit my personality?
If you’re not sure which color fits your style best, consider taking inspiration from some of our favorite 1920s and 1930s actresses such as Clara Bow or Jean Harlow. Both these women were known for their platinum blonde locks that contrasted brilliantly against all-black outfits! If this doesn’t sound like something you’re interested in, then don’t worry; we have plenty more styles available!
4. Vintage Hairstyles for Short Hair
Short hair is a great way to take advantage of vintage hairstyles, as most styles work well with short cuts. If you’re looking for something quick and easy, try out the following retro style: French Braid + Curl.
It’s simple enough that it can be done in minutes before heading out – though make sure your bobby pins are on-hand! To achieve this look, divide your hair into two sections at the top of your head. Then French braid one section while leaving the other unbraided.
When finished braiding both pieces together and then curl them with an iron or curling wand, depending on how tight you want the curls to be. You can also opt for a looser wave if desired
Conclusion
In conclusion, vintage hairstyles are more than just a trend – they are a timeless and classic way to add some flair and personality to your look. From the iconic victory rolls of the 1940s to the sleek and sophisticated finger waves of the 1920s, there is a retro-inspired haircut for every woman. The best part? These styles are not only beautiful but also easy to achieve with the right techniques and products. So whether you’re looking for a bold statement or just want to add some vintage vibes to your everyday look, don’t be afraid to try out one of these fabulous hairstyles. Remember, fashion is cyclical and what was once old will always come back in style.
Embrace your inner glam girl and rock those vintage tresses with confidence! And let’s not forget, vintage hairstyles can be adapted to suit any hair length or texture, making them accessible to everyone. So why not gather some inspiration from old Hollywood starlets like Audrey Hepburn or Marilyn Monroe and put your own modern twist on a retro ‘do? Don’t be afraid to experiment and have fun with your hair – after all, that’s what fashion is all about!
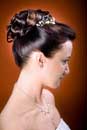
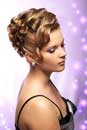
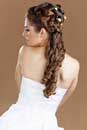
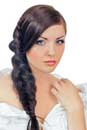
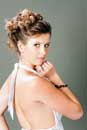
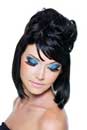
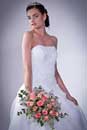
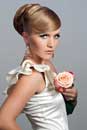
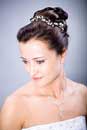
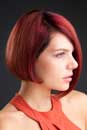
Gallery #1
 |  |  |
 |  |  |
 |  |  |
 |  |  |
——————–
Just added new photo
 |  |  |
|  |  |


