The pixie haircut is one of the hottest hair trends for 2024. While many find the modern pixie cut edgy and bold, I’ve always been drawn to the softer, more romantic side-swept variation. With layered pieces that frame the face and a subtle movement from one side to the other, the side-swept pixie feels feminine and flirty without losing any edge.
There is something endlessly appealing about how it highlights facial features while still celebrating short hair. In this post, I’ll share some of my favorite ways to style a side-swept pixie cut, from messy tousled looks to polished updos. Whether you’re considering this cut for the first time or looking for new ways to refresh your existing style, keep reading for inspiration on how to rock the timeless side-swept pixie.
The Side Swept Pixie Haircut
Is it a very popular hairstyle for women? It is the latest trend in haircuts that can be worn as everyday do, or with some barbering to appear more formal and professional.
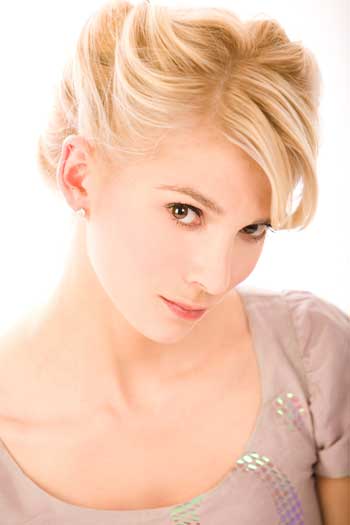
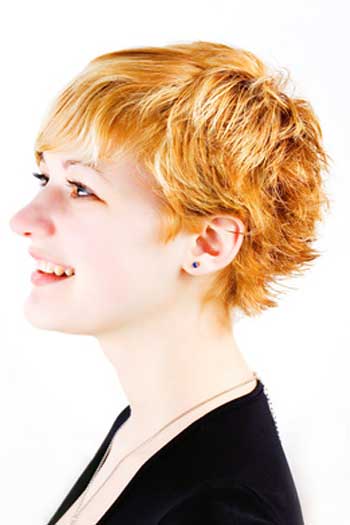
– The side swept pixie haircut has bangs that sweep from one side of the forehead to across the other side, while still staying fairly short on top. This creates a framing effect around your entire face so you look young and fresh!
– Side swept pixie haircuts are often cut with layers throughout because they give them their fullness back after being scissor cut off during styling. These layers will also create volume if you have fine hair which won’t hold its weight well without some help getting it up into place
How to Style the Side Swept Pixie Haircut
– Launch a side swept pixie haircut with layers by separating the hair on your head into two sections.
– Twist one section of hair and clip it to the back of your head, away from your face.
– Wrap the other half around to create some volume in front. Secure it at the nape of the neck or topknot for extra hold if needed.
– Finish up by spritzing hairspray over all strands from root to tip before releasing them down onto your shoulders and framing that stunning new look!
What Products to Use for Your Side Swept Pixie Haircut
– Use a volumizing mousse.
– Blow-dry the hair upside down to create volume and use a round brush at the roots.
– Add some texturizing powder for more texture and lift in stubborn areas.
– Finish with hairspray, but finish off by combing through with your fingers too – this will help tames flyaway and stray pieces of hair that won’t stay put!
what products to use for side-swept pixie haircuts? Volumes with mousse blow-dry upside down, add texturizing power, and spray it all out from loose locks into shapely waves.”
Where to Get Your Next Professional Cut if You Want One Done Professionally
– The best part about the side-swept pixie haircut is that you can go to your local salon and have a professional cut it for you.
– If this interests you, make sure to do some research on stylists in your area who know how to handle tricky hair types like curly, frizzy, or thinning hair.
Key Takeaways: While I don’t recommend cutting your hair because of its often difficult texture (which leads me into my next section) if you want an even more dramatic look than what’s already been described then take someone else with experience and trust their opinion! It’ll be worth it in the end when all those compliments start rolling in from friends and family members alike. These are just a few
What You Need for a DIY at Home Cut
The side swept pixie haircut is not for the faint of heart. It may seem like a simple hairstyle on paper, but in reality, it’s probably one of the most complicated cuts to get without experience. You need someone who knows what they’re doing and can have patience with you as you find your style and grow into this new cut. The good news there are some things that anyone can do at home if their hair starts growing out too long or needs a touch-up before heading back to the salon
Conclusion
Side swept pixie haircuts are not just a trendy choice for women, but they also offer a multitude of benefits. From enhancing facial features to low maintenance styling, these haircuts are perfect for any busy woman looking to make a bold statement with their hairstyle. Whether you have thick or fine hair, there is a side swept pixie haircut that can be tailored to your specific needs and preferences. And the best part? These haircuts are versatile and can be styled in various ways to suit different occasions or moods.
Say goodbye to boring and traditional cuts and embrace the unique and chic style of a side swept pixie haircut. Don’t be afraid to take a leap and try something new, because as they say, “Life is too short to have boring hair.” With the endless possibilities of this haircut and its ability to add an edgy touch to any look, it’s safe to say that side swept pixie haircuts are here to stay. So why not give it a try? Who knows, you may just fall in love with your new fierce and confident self!
 |  |  |
 |  |  |
 |  |  |
 |  |  |
——————–
Just added new photo
 |  |  |
 |  |  |

